This post may contain affiliate links, which means if you make a purchase from one of these links I will get a commission.
I don’t like to think of these crafting posts as tutorials, because I am sure to leave something out and I am definitely NOT an expert. I like to think of them as guides, inspiration to get your own creative juices flowing. Most of my projects are with thrift store finds/stuff I already have around the house. So take a look around you with fresh eyes, hit that garage sale or favorite thrift store and make some magic of your own! Because when you make it yourself, you get to enjoy the bragging rights.
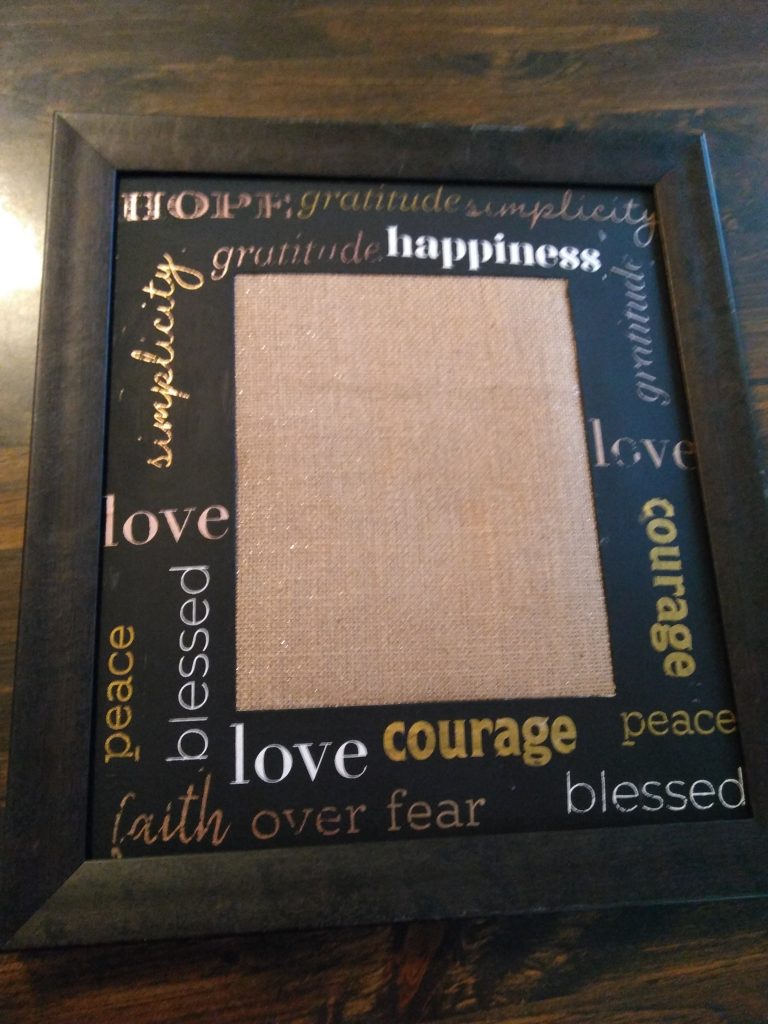
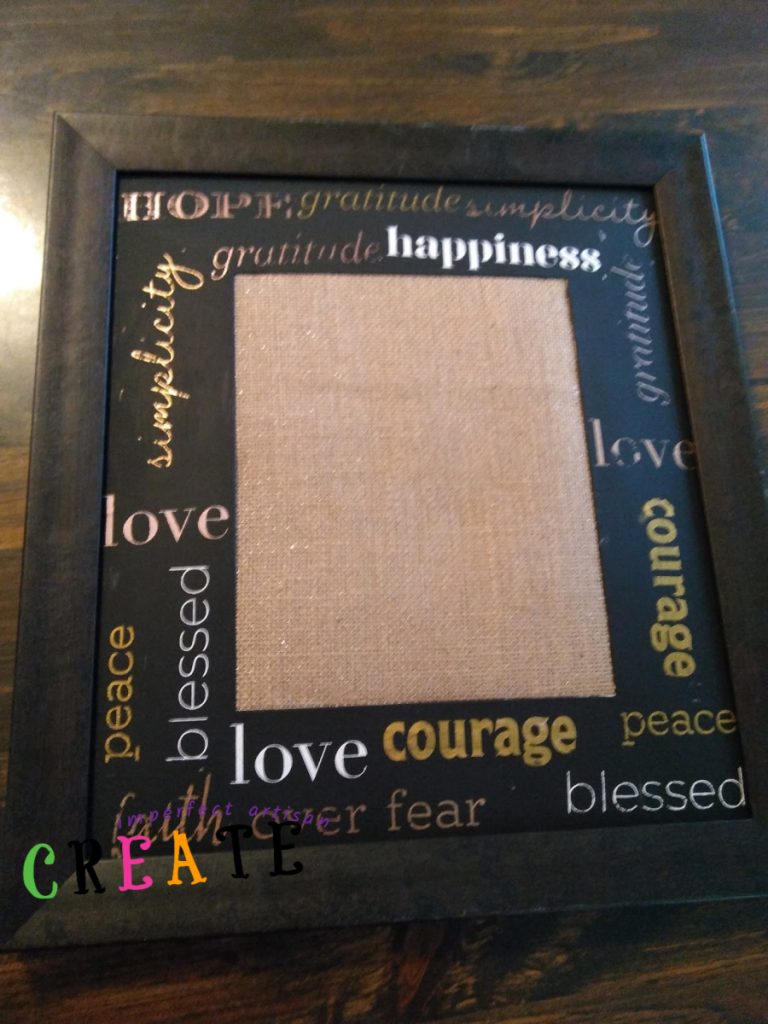
I bought this frame intending to make this project using a family photo in the center. But as I was taking the frame apart I cracked the glass without even realizing it. I wasn’t sure what to do with the frame and it sat on my shelf for quite a while before I was inspired to make a mini bulletin board. This would make a perfect spot to hang party invitations or even trade love notes with your family. The possibilities are truly amazing!
A Maker’s Studio offers project bundles as well as individual products. These are projects that A Maker’s Studio founder, Amy Howard, makes right along with you and shows you all her tips and techniques, called Maker Mondays. This Inspirational Frame Sample Bundle is one of them.
Supplies Needed to Repurpose an Old Frame and Mat with Inspirational Words
- putty knife
- a frame with a thick mat in good condition
- Rescue Restore Paint in Little Black Dress
- foam sponge brush
- Be Still stencil
- ChalkArt in Peace and Joy
- ChalkArt in Metallic Copper
- ChalkArt in Metallic Gold
- ChalkArt Spreader
- painter’s tape
- burlap
- quilt batting
Tips for Repurposing an Old Frame and Mat with Inspirational Words
A brand new A Maker’s Studio stencil is very adhesive and may tear bits of itself off and stick to your project, so if using a brand new stencil on paper, place the stencil on a piece of cloth or other surface and remove a couple of times to lessen the adhesion.
If you worry that you will spread the Gel Ink past the stencil and on to your surface, use a piece or two of painter’s tape on the edge of the stencil to avoid extraneous Gel Ink on your piece.
Spreaders can be cut to a more manageable size with a pair of scissors for more detailed or smaller work. When done with the spreader, simply wash ink or paint off and reuse.
Clean the reusable stencil with water and a lint-free sponge and let dry adhesive side up. When the stencil is dry place protective backing on the adhesive side of stencil and store.
When using A Maker’s Studio Stencils, they are not cut out completely, the stencil is a mesh that requires pushing the ink or paint through, not just laying the ink on top. Make sure to press the ChalkArt!
You can also mix ChalkArt and make your own custom colors, I mixed gold with copper to get a lovely rose gold shade for some of my words.
Repurposing an Old Frame and Mat with Inspirational Words 101
- Protect your work surface and your clothing.
- Carefully remove backing and picture from frame (a putty knife is perfect for this)
- Stir your Rescue Restore Paint well and paint Little Black Dress onto your frame mat with a foam sponge brush, using long strokes. Apply a thin coat. Let dry 30 minutes and add a second coat. Let dry.
- Once your mat is dry, apply the inspirational word stencils around mat securing edges with painter’s tape if you’re worried you’ll get ChalkArt outside the lines.
- Using the spreader apply your Peace and Joy, Metallic Gold, and Metallic Copper Chalkart to stencil, making sure to press through the mesh so that the color goes all the way through to the surface. Remember you can mix colors too! Remove stencil as soon as you are done, ChalkArt dries quickly and will want to pull away from your surface and stay on the stencil if it dries too much.
- Clean the reusable stencil with water and a lint-free sponge and let dry adhesive side up.
- When the stencil is dry place protective backing on the adhesive side of stencil and store.
- Let the ChalkArt on the mat dry, now you are ready to reassemble your frame.
- If you are using a photo, simply put the frame back together, if you are making a bulletin board, cut a piece of burlap and a piece of quilt batting large enough to be held in place by the mat, but not larger than your frame. I just stacked everything together and it worked fine when I reassembled the frame, but if you are concerned, you can tape the burlap and batting to the frame backing or use spray adhesive.
- Enjoy your fantastic creation!