This post may contain affiliate links, which means if you make a purchase from one of these links I will get a commission.
I don’t like to think of these crafting posts as tutorials, because I am sure to leave something out and I am definitely NOT an expert. I like to think of them as guides, inspiration to get your own creative juices flowing. Most of my projects are with thrift store finds/stuff I already have around the house. So take a look around you with fresh eyes, hit that garage sale or favorite thrift store and make some magic of your own! Because when you make it yourself, you get to enjoy the bragging rights.
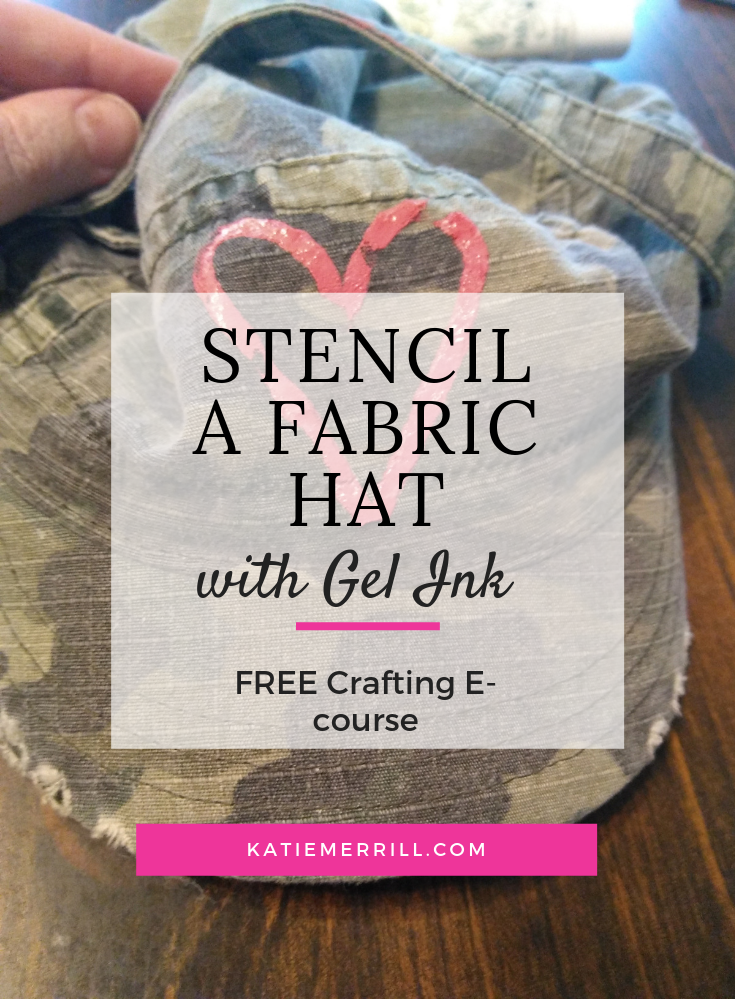
It was just on a whim that I picked up this fun camo hat at a yard sale. I liked it, but I knew that before I would wear it, it needed a little something extra. All I needed was some Gel Ink and a cute stencil to create a seriously cute hat.


Supplies Needed to Stencil Fabric
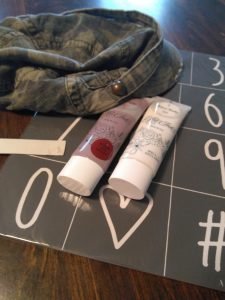
- fabric to stencil on, like a hat
- stencil
- Gel Ink (I mixed Well I Declare and Bless His Heart)
- ChalkArt Spreader
- cotton pressing cloth
- iron
Tips to Stencil Fabric
A brand new A Maker’s Studio stencil is very adhesive and may tear bits of itself off and stick to your project, so if using a brand new stencil on paper, place the stencil on a piece of cloth or other surface and remove a couple of times to lessen the adhesion.
If you worry that you will spread the Gel Ink past the stencil and on to your surface, use a piece or two of painter’s tape on the edge of the stencil to avoid extraneous Gel Ink on your piece.
Spreaders can be cut to a more manageable size with a pair of scissors for more detailed or smaller work. When done with the spreader, simply wash ink or paint off and reuse.
Clean the reusable stencil with water and a lint-free sponge and let dry adhesive side up. When the stencil is dry place protective backing on the adhesive side of stencil and store.
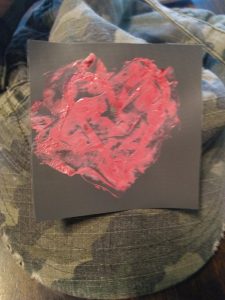
When using A Maker’s Studio Stencils, they are not cut out completely, the stencil is a mesh that requires pushing the ink or paint through, not just laying the ink on top. Make sure to press the ink!
Gel Ink is semi-permanent. For the Gel Ink to have the longest life possible, heat set the ink to the fabric. If you wash the item, turn inside out, wash in cold water and line dry.
Stenciling Fabric 101
- Protect your work surface and your clothing.
- Firmly press the stencil into place (A Maker’s Studio stencils are self-adhesive and reusable) and tape edges.
- Squirt some red and white ink onto a paper plate or other surface and stir with ChalkArt spreader to combine colors to make the shade of pink desired.
- Using the spreader press a small amount of ink through the mesh cut out of the stencil through to the fabric.
- Carefully remove the stencil to be cleaned with water and a lint-free cloth, let dry adhesive side up and replace protective backing to stencil before storing.
- Let Gel Ink dry at least 4 hours to overnight.
- Pre-heat iron to 250 degrees (no steam!). Place a cotton pressing cloth over the Gel Ink on the fabric. Run the iron over the pressing cloth continuously for 2-4 minutes to heat set the Gel Ink.
- Enjoy your fantastic creation!